
Follow this workflow guide to take your terrain and texture splatmaps into the Unity engine.
Terrain into Unity
Within World Machine
- Place a Height Output device into your world. Wire the terrain you wish to export into the device’s input.
- Choose your export format within the File Output device. You should use the RAW16 format.
- Build your world and export all files. The “Export Terrain files…” option from the File Menu provides a central location to do both.
Import into Unity
Luckily, Unity makes it easy to import a terrain. The exact process depends on the version of Unity you’re using, but it goes something like this:
Simply follow these steps:
- From the GameObject menu, choose “3D Object” -> “Create a Terrain”
- From the terrain properties (Texture Resolution) subpanel, choose “Import Raw”
- By default Unity considers both 8 and 16bit RAWs to use only the .raw extension, whereas World Machine uses .r16. Change the import filter to “All Files” and navigate to where you saved your exported World Machine .r16 file. Select it.
- In the Import dialog, make sure the depth is Bit16 and the byte order is changed to Windows, then hit Import
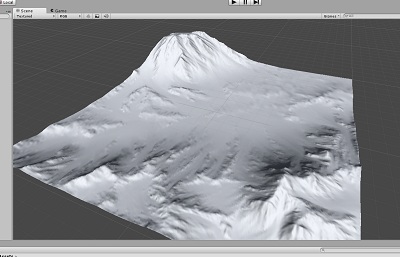
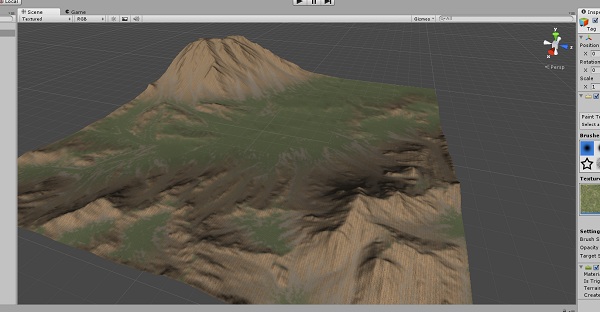
You should now have your Terrain inside Unity! You will probably have to play with the Terrain Scale to get the size to fit correctly into your scene.
Texture export to Unity
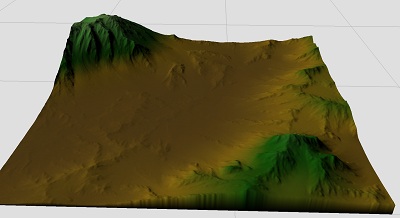
Unity has built-in support for texture weight-maps (called “splat” maps). You can create multiple layers of terrain textures and paint each one onto the terrain.
This simple workflow provides a way to import the texture splatmaps created within World Machine into Unity. Please note that although this method works for basic Unity Terrains, advanced users may require their own techniques.
Within World Machine
- Create your terrain texturing masks based upon whatever criteria you want (for example, using Height Selectors, Slope Selectors, Erosion masks, etc).
- Use the Splat Converter device to control your splatmaps and enforce proper weighting (sum-to-one, etc). For more details and an example world using the Splat Converter, see the “Splatmap Converter.tmd” example file included in the World Machine Examples under “New Examples for WM 2.3\Techniques”
- To convert your individual maps into a bitmap, wire them into a Channel Converter, which will produce an RGB image for the first three channels. The fourth will be used as the Alpha channel of the bitmap. Wire the resulting maps into one or more bitmap output devices to create a 4 channel splatmap. If you are using more than 4 textures, simply create multiple bitmap outputs and adjust the Splat Converter accordingly.
- Build the world and export your terrain and splatmap.
Within Unity
Unity doesn’t provide a built-in way to replace the texture layer data with your custom splatmaps. To easily import a splatmap from World Machine into Unity, you’ll need a simple Unity script that can import and replace splatmaps.
Download the script provided below and extract it into your project folder. Make sure that ends up in the YourProject/Assets/Editor folder. If Unity can find it, it will compile the script and the Terrain menu with the replacement script will appear.
Download Unity Splatmap Replacer script
1. Create your Terrain as above and verify that everything has imported successfully.
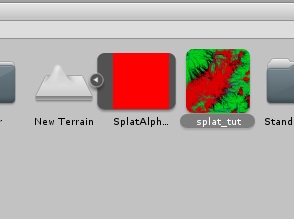
2. Assign the textures that you want to use on your terrain as normal. Then make sure you save the scene. You will see an all-red splatmap for your terrain appear in the asset browser.
3. Import the splatmap you created and exported in World Machine previously. It should look like the image on the right:
4. Go to the Inspector for the imported splatmap and change the following settings:
- Texture Type: Advanced
- Read/Write Enabled: checked
- Format: ARGB 32 bit
- And then press Apply.
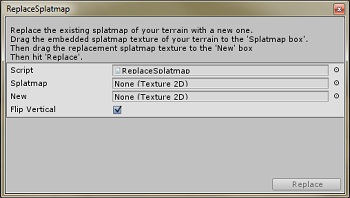
5. From the Terrain menu, choose “Replace Splatmap…”
If you don’t see this entry, it is because the Splat replacer script above has not been correctly located in your project folder. Drag the embedded splatmap inside the terrain to the first “Splatmap” entry, then your imported splatmap to the “New” entry. When importing from World Machine, if you have not manually flipped your heightfield previously make sure “Flip Vertical” remains checked to match the flipped orientation of the heightfield.
All Done!
Start the discussion at forum.world-machine.com