
Unlike many other terrain editors that function like paint programs, World Machine operates on a procedural level. A World Machine world file doesn’t define a terrain, but the steps to create a terrain. This is the source of both its power and its complexity.
When working with World Machine, your mission is to determine the overall appearance and characteristics of the terrain, and then allow our algorithms to create and detail the appearance of your world. This way of working and thinking at a higher level compared to sculpting takes some getting used to, but the rewards are huge: You can create impressive terrains with relatively little work, and once you have created a terrain that you like, you can use the same world file with different random “seeds” to produce a different terrain entirely that retains the same feel.
The tradeoff in computer graphics for this is usually a lack of control over feature placement. However, the Shapes device and other tools let you to work in a more artistic fashion, plotting out the terrain as roughly or precisely as you like. The ability to determine for yourself the level of control you exert is one of the best super-powers that World Machine makes available to you as an artist.
Concepts you should know
World Machine operates on worlds. A world is simply the collection of steps used to create the terrain, as well as information about areas to view, detail level, and so on. These steps are referred to as devices, and each device will perform some operation on the world. The devices are represented graphically in something like a flowchart. The workview is where you can see and change the devices (steps taken). World Machine continuously previews each device in your world. To create the final product, you must build the world, which creates a high resolution output that you can then save to disk.
In the next chapter, you’ll learn how to use the device workview and interact with devices to create your world.
The Starting World
When you first start World Machine, you’ll see a screen like the below:
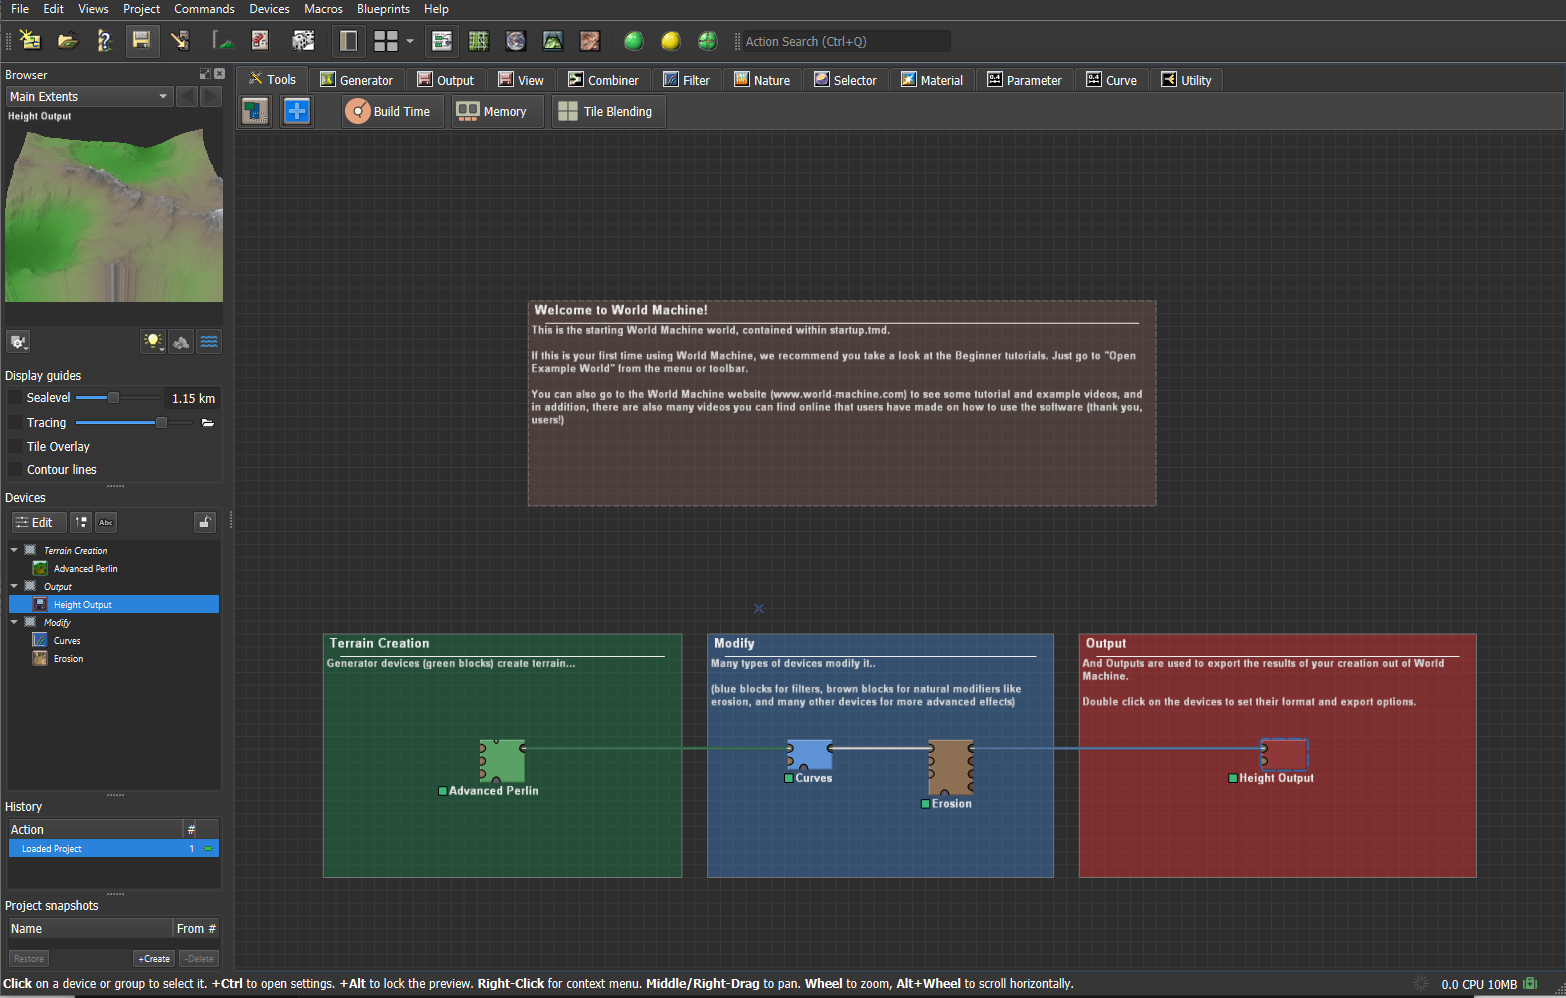
Each aspect of the screen above will be visited in great detail in later chapters. The most important point is to understand how each of the basic concepts relates to what you can see:
● The world is the contents of the device workview (the screen visible above)
● The devices are the small colored blocks; there are four of them in the photo above. The devices reside within larger labelled areas called groups, which help you organize your world.
● The lines connecting the blocks are wires, showing the order that actions are taken in and defining the flow of data.
● World Machine is displaying a preview of the currently selected device in the upper-left corner
● To build the world, you must choose the Build option from the menu or toolbar, which will bring up a progress report dialog while calculations are being performed. Once the world is built, you can then export the terrain as mentioned in Chapter 6.
You can select any device and see what the terrain looks like at that point by clicking on it. If you like learning by exploration, there is a large collection of various example files sorted by difficulty in concepts in the “/Examples” folder under your World Machine installation. Otherwise, continue reading below about how to use the Device Workview and what it all means.
Start the discussion at forum.world-machine.com