
You’ll see a panel running vertically along the left side of the screen. This panel contains a number of useful shortcuts and tools to help understand and manipulate your world.
The leftside view can be shown and hidden by pressing the F4 key. You can also resize the panel by dragging on the splitter between it and the primary viewport area, or drag the panel and put it on a different screen completely if you wish.
Let’s take a look at each component in turn:
Terrain Preview Window
This window allows you to view a small, preview version of the current terrain area before it is built. This window shows whatever device or port is currently selected.
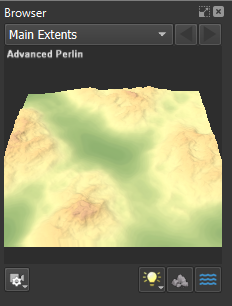
Above the preview window, the name of the current render extent is displayed. Clicking the scroll arrows next to the name allows you to cycle through all of the currently defined render extents. You can create new render extents in the Explorer View or Project Settings.
If you drag in the preview window, you can manipulate the current lighting direction in all viewports. You can also hold down ALT and navigate within the viewport exactly as if it was a 3D View.
Immediately below the viewport is a line of buttons. From left to right, they are:
Configure Viewport
Click this button to open a drop-down menu with several options for manipulating the 3D view inside the preview:
- Zoom camera to fit – adjust the camera zoom distance to fit the current scene into the window.
- Reset to top view – Position the camera looking directly down on the terrain
- Reset to perspective view – Position the camera looking at the terrain from a moderate angle, aligned with the North-South (Y) axis.
Global View Toggles
The next three buttons are global toggles. They enable/disable their particular option across every viewport in the entire program.
- Show Lighting – Toggle whether or not to light the terrain. You can define the lighting by right-clicking to bring up the Viewport Lighting Setup dialog.
- Show Materials – Toggle the use of any material for the terrain. When enabled, heightfields will have the currently defined color map, and scenes will use their material input. When disabled, the terrain will be shown in a neutral gray only.
- Show Water – Toggle the display of scene water, if any. If this is off, no water will be displayed regardless of which device is selected.
Display Guides
Display guides are shown in every view and help you design and construct your world.
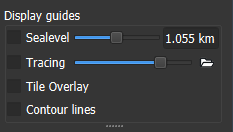
Each display guide has a checkbox that can be toggled to turn it on or off globally. Some guides have additional controls to manipulate them.
In order, the guides are are:
- Sealevel: Display a flat plane that can be used to show the water level of the ocean. This is a helpful guide only, and does not actually create water within your scene. Set the water level either directly or by using the slider.
- Tracing: Drape an external image atop your terrain. This is very helpful when recreating continents and other features from some external source within World Machine (See the Shapes (Layout Generator) for more information on this technique). The folder icon to the right of the slider lets you pick the file to use, while the slider itself controls the opacity of the tracing guide.
- Tile Overlay (Pro only): Overlay the boundaries of each individual output tile atop the world
- Contour Lines: Show contour lines on the terrain, much like a traditional topographic map. Very helpful in understanding the shape of the terrain in areas of low contrast.
Devices
The device list shows you all of the top-level devices that exist in your world. This can be useful in selecting and navigating around between them. There are also some convenience buttons for taking actions upon the currently selected device.
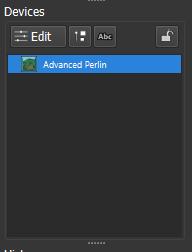
The shortcuts above the device list let you:
- Edit device properties: Opens a new window with the selected device’s settings.
- Set device resolution: Override the world resolution and spatial type for the selected device.
- Set name: Give the device a unique name; you can also do this from the device settings window.
- Lock preview: Lock all views to show this device, even if you later select a different one. Locking a device that is already locked will unlock the view.
Locking the preview is an incredibly important operation! You will often want to continue viewing the final result of your scene while editing various other devices, for example.
History
The history panel shows you all of the edits you have made to your world since the session started. You can jump to any point in time you wish simply by clicking there:
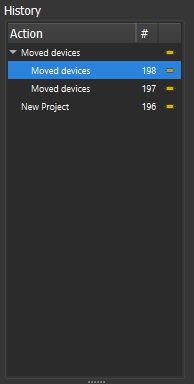
Unless you maintain a project session file (Pro Edition only), the history of your edits are only preserved in the current editing session, and will be lost when the world is saved and reloaded.
Project Snapshots
You can save several versions of your world as you work. It can be very helpful to create snapshots for major milestones of your project world.
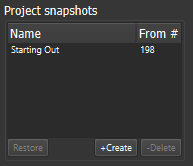
Being able to recreate an exported asset exactly even if you’ve later improved on the project is very useful!
Start the discussion at forum.world-machine.com