
World Machine has a variety of views which provide a view of the current terrain. Some display the current render extents, while others view the entire infinite procedural world in which the render extents are defined.
Leftside View
The “Leftside View”, as it is called, is the toolbar running vertically along the left side of the screen. The leftview can be shown and hidden by pressing the F4 key. For clarity, we will examine each section of the toolbar by itself.
Terrain Preview Window
This window allows you to view a small, preview version of the current terrain area before it is built. This window is updated in real-time as you adjust device settings, allowing you to quickly see the effect your modifications have on the terrain.
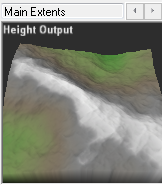
Above the preview window, the name of the current render extent is displayed. Clicking the scroll arrows next to the name allows you to cycle through all of the currently defined render extents.
The preview window can be set to either 2D or 3D mode. Depending on the mode, you may be able to perform different actions, shown below. To toggle the preview mode, click the “2D/3D” button below the preview window.
The exact operation performed when you click and drag in the preview window depends upon your view navigation options. Click dragging will perform the following actions:
2D Mode: You may change the direction of the current terrain lighting in the preview area. 3D Mode: You may rotate and zoom the view to find a new viewing angle of the terrain. In addition, you may change the direction of the current lighting of the terrain.
View Option Buttons:
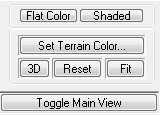
The three buttons right below the preview window allow you to change how terrains are shaded in World Machine:
• Height: Do not shade maps; Assign color by height only.
• Shade: Shade by terrain features (diffuse lighting)
• H+S: Assign color by height and also shade the terrain features
• Set Terrain Color: Choose a color scheme for the terrain. This is a cosmetic choice only and will not affect the terrain in any way.
• 2D/3D: This button toggles the preview window between 2D and 3D display modes.
• Reset Preview: Resets the lighting and camera angle of the preview window to default. Useful if you ever “get lost”.
• Fit: Automatically sets the zoom level of the preview to fit the terrain into the view.
• Toggle Main View: This button will toggle the display in the main window between the Device Workview and the last active Viewing mode. Right-clicking on any empty region in one of the other views will also accomplish this.
Water Level This section controls the optional water plane that WM can display to help you visualize a global water level that your application might use.
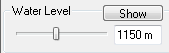
You can show or hide the waterlevel display by clicking the appropriate button. Either entering a value directly or moving the slider will allow you to change the waterlevel.
Device Navigation Area
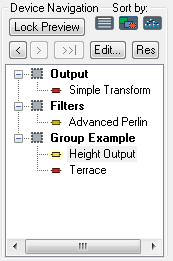
The device navigation list shows every device that exists in the current world. Devices are listed by either the creation order of devices or by groups. You can change the currently selected device by clicking on a new one; double-clicking will change that device’s properties.
• Lock Preview on Device (f hotkey): This very useful function allows you to ‘freeze’ the preview window onto a device other than the currently selected one. For example, you may wish to freeze the preview onto a terrain filter device, and then go back up the chain and modify the settings of the generator device and see the filtered changes in real-time. Toggling the lock button again will disable the preview freeze.
• Move Backward: Changes the selected device to the prior device in the chain from the currently selected device.
• Move Forward: Selects the next device in the chain from the current one.
• Move to End: Selects the LAST device in the chain from the current one.
• Sort-By: Allows you to sort the device listing by either creation order, or grouping.
• Edit…: Brings up the properties dialog for the currently selected device.
3D View
The 3D View can be selected from the Command Bar, or by pressing F8
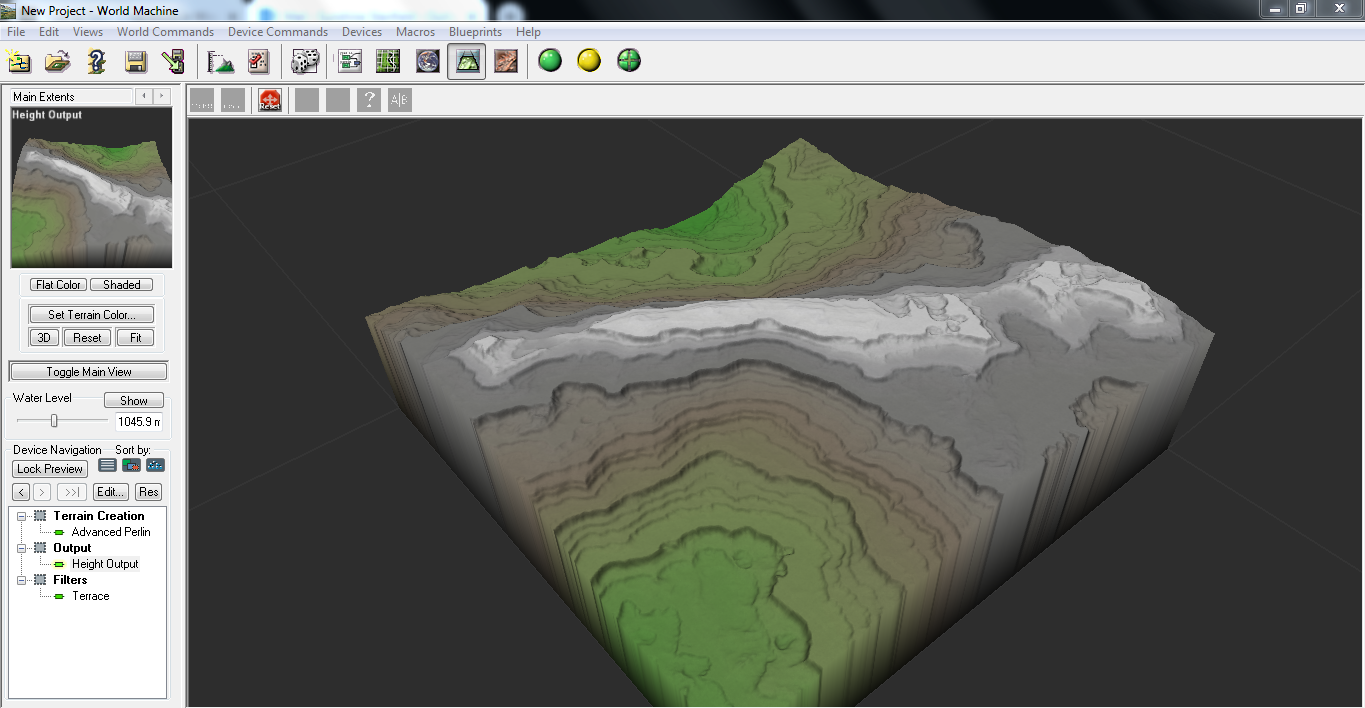
The 3D View will always show the current contents of the active terrain. If the currently selected device has not been built yet (displays a yellow rather than green light in the Workview), the 3D View will show the lower-resolution preview results rather than the full-detail build results.
The 3D View also has its own toolbar:

• Orbit: This button puts the 3D View into Orbit mode. In this mode, moving the mouse will orbit the view around the terrain. This mode makes it easy to inspect the terrain from a variety of angles.
• Free Look: The Free Look mode is similar to the traditional camera controls in WM 0.99. You can rotate the camera in any direction you want by left-clicking and dragging with the mouse; right-clicking and dragging up and down will move the camera vertically; and the arrow keys on the keyboard move the view in the direction you are facing. This allows you to freely navigate and inspect the terrain from wherever you wish.
• Reset View: This resets the current mode to its default rotation – useful if you’ve navigated somewhere strange and can’t find the terrain anymore!
• Snapshot Mode: The Snapshot more performs a “render” using Opengl at full terrain resolution. Typically terrains higher than 1024×1024 are rescaled down for display due to the millions of triangles produced. Snapshot mode lets you view the terrain in its fully detailed glory. Note that as soon as you move or adjust the view, it will revert back to the realtime display. • Detail Toggle: Turns detail texturing on or off. Using a detail texture can help give the terrain a better sense of scale, but you may wish to disable it in some instances to see the “true” terrain.
2D View
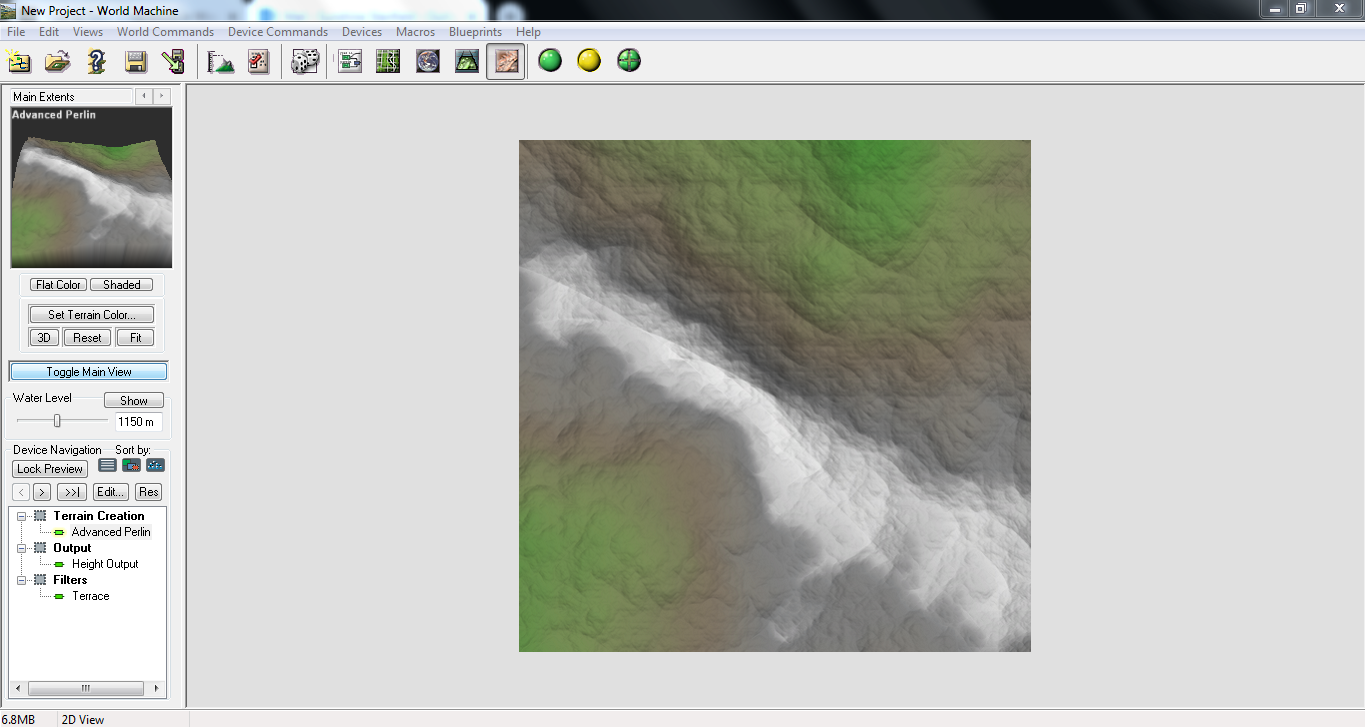
The 2D View can be selected from the Command Bar, or by pressing F9.
The 2D View offers you an overhead view of the terrain with optional shading applied to show the relief of the terrain. The 2D View does not use OpenGL or other 3D systems and so is a good viewing choice for very large maps, systems with slow 3D cards, or other conditions that favor 2D use.
The 2D View offers very little interactivity. The display will update to reflect new sunlight conditions when you use the Leftside view to adjust the lighting. When the map is large enough to extend past the view boundaries, you can use the scrollbars to view different areas of the terrain.
Layout View
Layout View can be selected from the Command Bar, or by pressing F6.
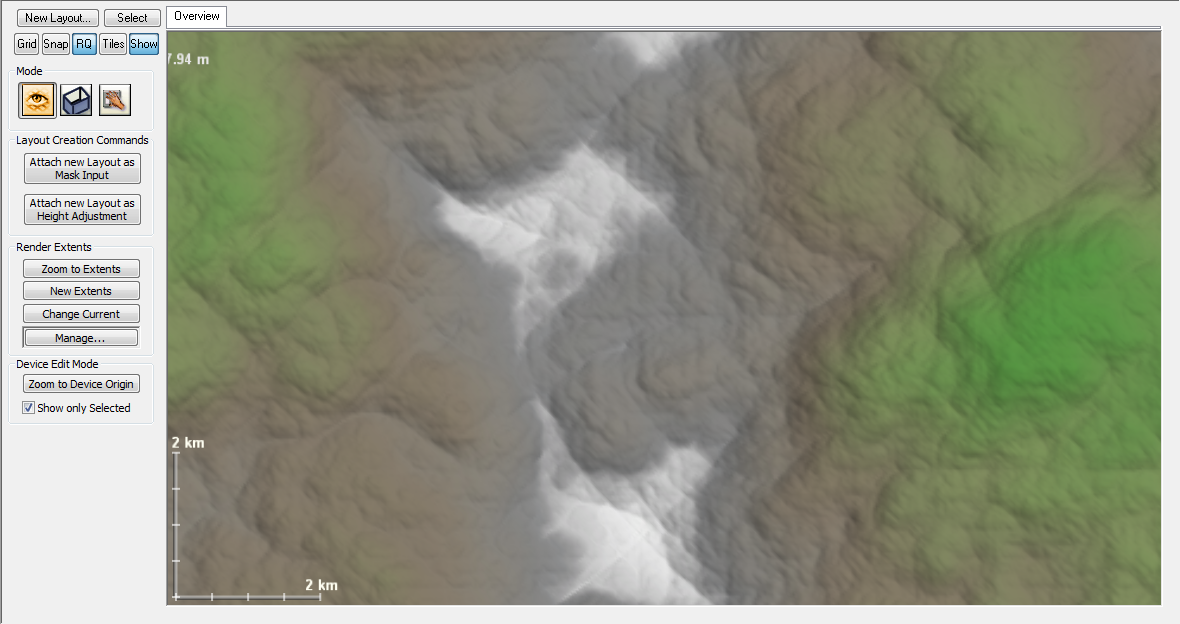
Layout View is extremely useful for planning out your world. Much like Explorer View, it displays terrain outside of the currently defined render extents. Layout View allows you to rapidly pan and zoom across the entire world, zooming in to view details at a range of a few meters, then pulling out to view many thousands of kilometers of terrain.
A Note about Terrain Artifacts: Layout and Explorer View can display any part of the entire virtual world, not just the render extents you designate. However, this ability means that some devices, in particular simulation-based devices such as Erosion, may not perform identically in these views as they do within the render extents. World Machine marks these devices with an optional warning symbol in the Device Workview. The warning symbol is a red exclamation point: “!” The severity of the problem depends upon the device and zoom level.
In addition, Layout View provides a visual way to set and modify render extents, and manipulate certain devices that expose parameters to visual adjustment.
The most important use of Layout View, however, is in conjunction with a Layout Generator to edit shapes in the Shape View. Chapter 5 of this manual is devoted to using this incredibly powerful feature. We’ll only slightly address this functionality here.
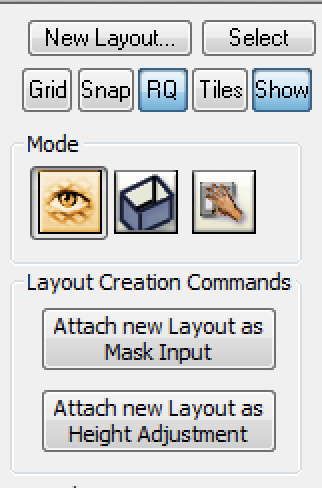
Layout Generator Commands
● New Layout: Creates a new Layout Generator and selects it into the view.
● Select: Selects as the current device, the Layout Tab being displayed in the view.
● Attach Layout as Mask: Creates a new Layout Generator and attaches it to the mask input of the currently selected device. This action is not available if the selected device has no mask input.
● Attach Layout as Height Adjustment: Attaches a Layout Generator to the output of the currently selected device. This action is not available if you are viewing a device with no output.
Common State Toggles Clicking any of the buttons in the common function area will toggle their status on/off. The button state is remembered seperately for the Overview tab and the Layout tabs.

● Grid: Display of a grid atop the terrain
● Snap: Snap the mouse to the grid
● RQ: Displaying the render extents
● Tiles: Show the render extent being used for tiled output, and show which areas of the terrain will be in which tile
● Show: Show or hide the display of terrain in the Layout View
Mode Buttons
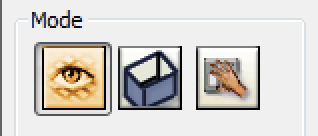
The three mode buttons control the operating mode while in the Overview.
Overview Mode
Overview Mode is the default mode. You can perform no actions, merely pan and zoom around the terrain.
Render Extent Mode
Render Extents Mode allows you to graphically add and manipulate your render extents.
Render Extent Manipulation
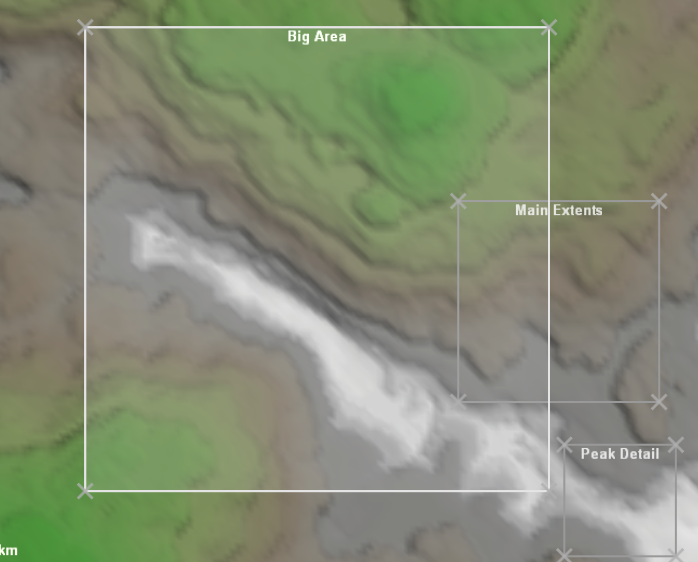
While in Render Extents mode, all of the currently defined extents are visible at their appropriate locations in worldspace. You can click and drag on either the corners of the extent quadrant, or on the extent itself to change its size or location.
Render Extent Commands The following commands are available in Render Extent Mode:
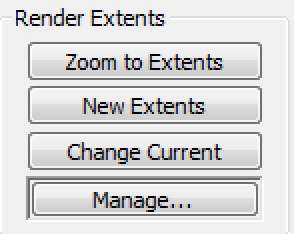
● Zoom to Extents: Brings into view the currently selected Render Extents
● New Extents: Adds a new Render Extent to the world, that defaults to the same location as the currently selected one.
● Set Current: Set the currently selected Render Extent by dragging a rectangle in the view. Once you finish the drag, the rectangle you defined is the new borders of the current Render Extent.
● Manage…: Bring up the Project Setup dialog to precisely define the Render Extents.
Device Mode
Device Mode lets you manipulate certain device parameters visually that Devices in your world may expose.
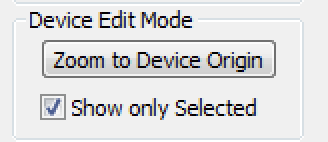
There are two options on the Layout Overview Bar that are applicable to Device Mode:
● Zoom to Device Origin: If the currently selected device supports a device origin, this button will zoom to its location. Only certain devices, principally Generators, have an origin.
● Show only Selected: When checked, you will only see controls (if any) from the currently selected device.
Explorer View
Explorer View can be selected from the Command Bar, or by pressing F7.
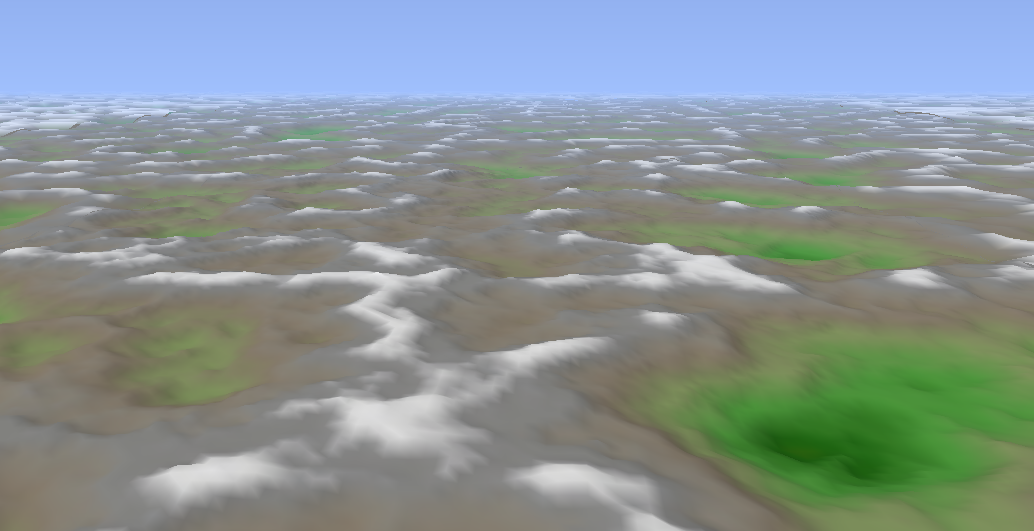
Explorer View allows you to easily explore the infinite world defined by the devices you placed into your World Machine world. Unlike the 2D and 3D views, you can see and travel over a representation of what the world looks like everywhere, not just within the render extent square. This is extremely useful for locating interesting areas of terrain in the current world defined by your device networks.
Explorer Details
What exactly Explorer mode looks like depends greatly upon the power of your computer system and the settings you selected in the Graphics Options dialog.
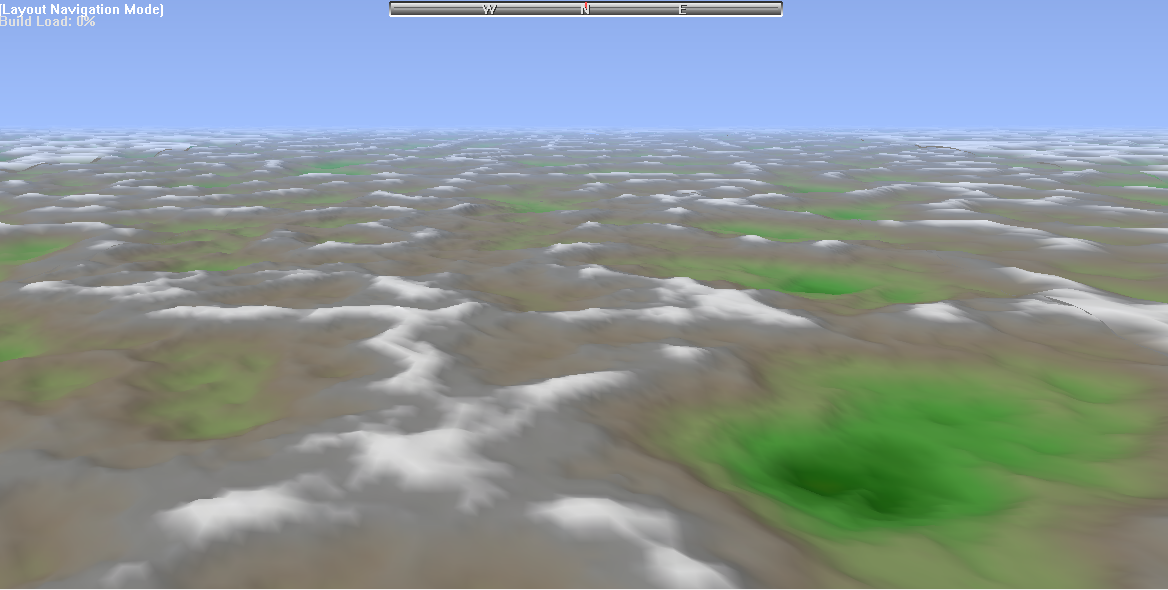
Explorer mode uses a refining progressive level of detail system. In non-technical terms, this means that the world starts out in very low detail, as seen on the left, and then is continuously refined so that nearby areas are shown with greater resolution, as on the right. In addition, beware that an old or underpowered system might be only able to run Explorer mode at a detail level equal to the left view above. A high-end computer with a powerful 3D card can look like the right side or better.
You can see that in the upper middle of the screen, there is a compass; the red marker indicates the current view direction. North is in the middle, indicated by N; the extreme sides of the compass both represent south.
On the left, there are three lines of text. They indicate the current coordinates of the view along the x and y axis, the speed with which you are moving, and the build load. Although the first two are self explanatory, the build load is less obvious.
Build load: The percentage of time during the last second that Explorer mode has been actively building tiles. Thus, if this value is greater than 0%, tiles are currently being created that will increase the level of detail of the current scene.
Exploring Explorer!
To use Explorer mode, you can simply jump in and go! Explorer starts in “God’s Eye” navigation mode. You can use the arrow keys and/or the drag the mouse on the landscape to move.
If you ever get lost, simply push the “View” button on the Explorer Toolbar. This will reset your current position so that you are looking at the current terrain render quad.
Explorer Toolbar

The Explorer Toolbar is divided into two segments that deal with different aspects of Explorer. They are, from left to right across the toolbar:
View Locations:
• View: Move the camera to bring the current render quad into view.
• Jump: Jump to a particular location by specifying X/Y coordinates.
Navigation Mode:
Each navigation mode uses the keys in a slightly different way:
• God’s Eye: Pan around the terrain by dragging it.
o Dragging the terrain with the left mouse button moves the camera o Dragging up/down with the right button changes your elevation o Left + Right mouse buttons together change the current viewing angle
• Fly: Fly above the terrain.
o Up/down arrow controls speed o Left/right arrow AND/OR mouse controls heading and elevation o Right mouse button + mouse up/down adjusts elevation
• Walk: Walk over the terrain.
o Up/down arrow steps forward/back o Left/right arrow sidesteps o Left mouse button + mouse left/right adjusts heading o Hold down the right mouse button to step forward
• Drive: Drive around the terrain in a buggy.
o Up/down arrow accelerates/brakes o Left/right arrow turns o Holding the ctrl key puts the buggy into “hover” mode o Holding the shift key acts as a “turbo boost”
Explorer Caveats
Explorer Mode is a very powerful and useful feature. However, because of its demanding nature, it requires a lot from your computer system. Specifically: a fast CPU to generate terrain tiles, and a fast video card to display them. You will likely need to play with the quality presets in the Layout/Explorer Performance Options dialog to find a performance level acceptable for your system.
In addition, much like Layout View, some devices will cause visual artifacting within Explorer Mode! See the warning in section 4.4 for more information.