
Although the devices you connect determine the look and feel of your world, it is the render extents that define the area of the world that you are working in. In this way, the render extents control what you’re looking at. You can zoom down to a very small area of a few meters, or cover a vast thousand- kilometer region of terrain.
World Machine allows you to have multiple Render Extents defined. This ability is useful to be able to see, work on, or export multiple different areas of the world. Render Extents can be created and manipulated in the Project Setup dialog, described below. In addition, Render Extents can be graphically manipulated in the Explorer View.
Project Setup
To setup your project options, select Project Settings from the Project menu, or click the appropriate icon in the toolbar.
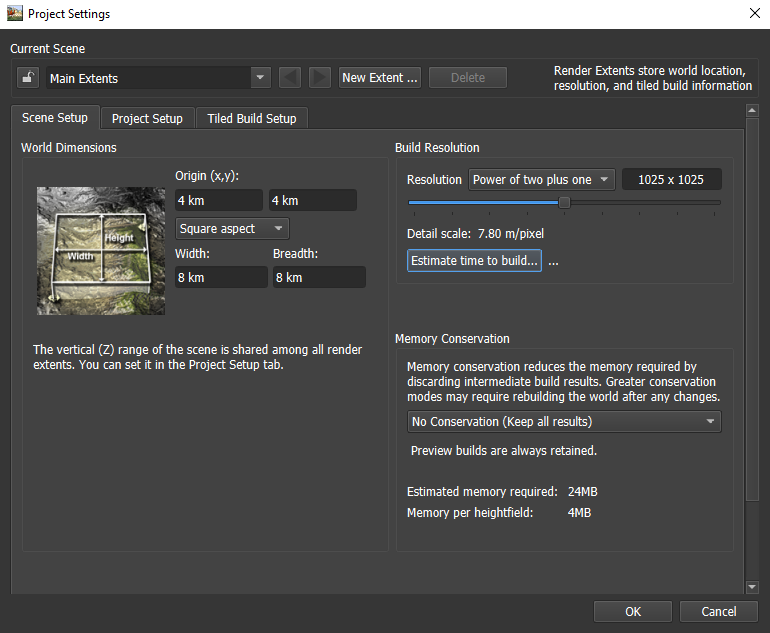
The project settings dialog will begin at the Scene Setup tab:
Let’s take a look through the section you’ll want to edit.
Scene Selection
Every world contains at least one render extent. You can add additional if you wish using the “New Extent…” button. You can select or cycle through the available render extents.
It is also possible to lock a render extent. This makes sure that its settings are not accidently changed in the future. To change a locked render extent requires you to first unlock it.
Resolution
Please note that the Basic Edition of World Machine is limited to 1025×1025 or lower resolution
The Resolution slider controls the size in pixels of the world to be built. Higher settings are more detailed but consume more memory and are slower to build. The exact maximum resolution at which you can build a given world at depends upon the devices present, and the amount of system memory you have.
- “Power of Two plus one”: This dropdown controls the resolution strategy to employ when adjusting the slider. It allows you to easily control the final resolution of your extent according to a variety of methods. If you want to set a completely custom resolution, just choose “Custom” from this strategy and enter the value in the resolution box.
Memory Conservation
Normally, World Machine keeps the results for every device in memory at once. This works well when you’re editing the world, but it requires a large amount of memory for high resolution builds.
When Memory Conservation is turned on, increasing amounts of build results are not kept and the network will likely have to be regenerated after any change. Previews are always retained.
The strategies available are:
- No Conservation: All results are always kept. This requires the most memory!
- Discard unconnected ports: Any ports that are not connected to another device have their results discarded.
- Keep only outputs and checkpoints: All devices have their results discarded after building, unless they are either a final output or a checkpoint. Checkpoints serve as a “cache”, letting you save intermediate results so that only a portion of the world will need to be rebuild after a change.
- Keep only outputs: All devices have their results discarded. Changing anything after a final build will require another full final build.
World Dimensions
This very important section allows you to specify the size and shape of your render extents. These are all presented as specific numerical values; if you want to set the render extent graphically, use the Explorer View.
- Origin: The center of the render extent in worldspace.
- Width & Breadth: The size of the extent on the X and Y axis, centered around the origin.
- Square/Nonsquare: This toggle allows you to constrain the width and breadth to be equal to each other.
As mentioned in the dialog, the maximum vertical elevation is global to all of your render extents, and is set in the Project Setup tab.
Project Setup
This tab contains general options for your project.
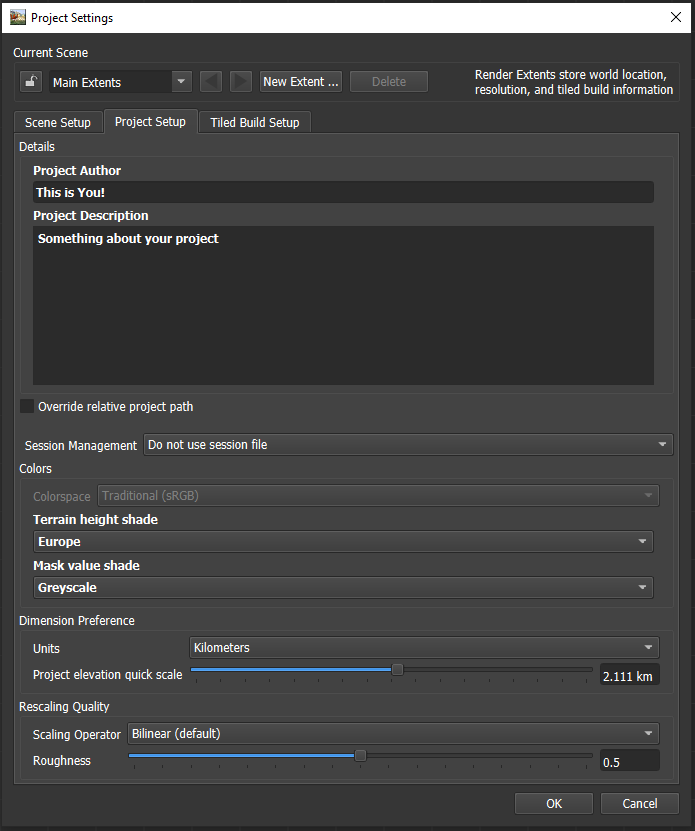
- Author and Description: You can record your name and add any description to the project that you wish that will help yourself or others in the future.
- Override relative project path: When checked, you can set the base folder that all relative paths in this project will resolve from. If unchecked, the default is always the location of your worldfile.
Colors
Heightfields have automatic color-by-elevation applied to them as a visual aid. You can choose the color scheme you wish to apply here. This color scheme is only intended as a visual aid; you’ll typically create a custom texture for your terrain within the world itself.
Dimension Preference
You can choose to present distances in either kilometer or unitless (World Machine Units). For most purposes, you should work with metric units.
You can also set the maximum elevation possible in your project. Internally, World Machine keeps all height information as a number between 0 and 1. The scaling value set here allows you to set the elevation in meters that a maximum height value refers to. The greater this number, the taller the maximum mountain height.
Note that this scaling value is applied worldwide; increasing the value here will instantly increase the apparent vertical relief of every terrain in the world. If the terrain you’re creating is sensitive to having exact elevations, it’s advisable to set this only once at the start of your project to the greatest range of elevations you foresee using and then not change the value.
Tiled Export Options (Professional Edition Only)
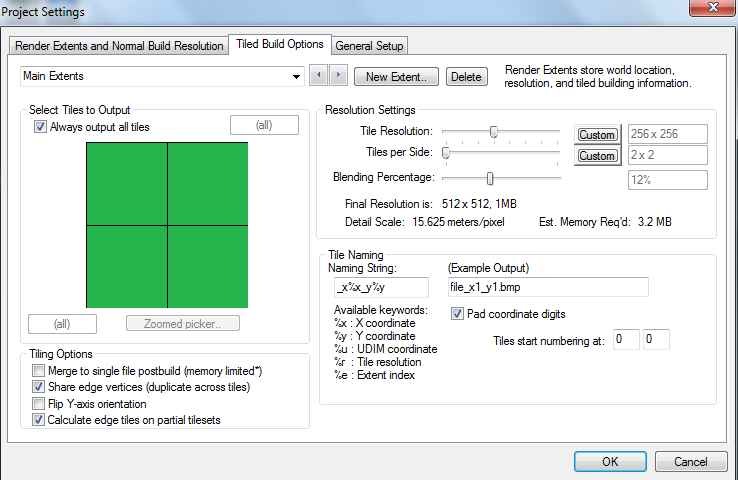
Please see the Professional Edition Appendix for information on Tiled Builds!
Start the discussion at forum.world-machine.com