
World Machine worlds only describe a set of operations to create the terrain rather than the terrain itself. The action of importing or exporting a terrain is described by adding device nodes to the world
File Output
Saving a file to disk is a simple but important part of building your world. Exporting a file is done by using an Output Node to save terrain (or other data) to disk. There are several types of output possible, including terrain heightfields, meshes, and bitmaps. You can output many files from an individual world. For example, from a single project file you could save a terrain heightfield, a texture map to apply to the heightfield, and several additional masks for further use (perhaps in placing vegetation or other purposes).
To export data from World Machine, you must place an appropriate Output node from the toolbar into the world and wire your final terrain data into that node.

Note: the area exported will always be the currently selected Render Extents!
Heightfields
To export a terrain heightfield, use the default File Output node that the starting world includes, or place a new File Output node into the world from the toolbar.
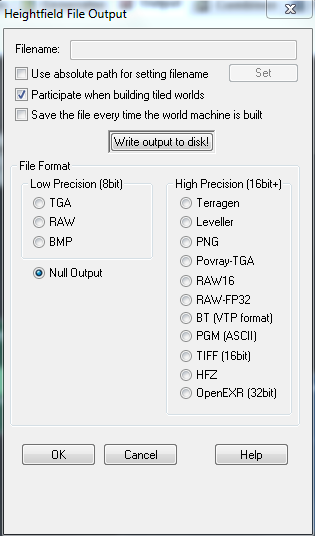
You can export in many different formats, as seen above. Your choice of what format to use will be governed by the needs of your rendering software, terrain engine, or other further terrain application.
The basic sequence of steps are:
1. Select the file format you wish to export
2. Set the filename by pushing the “Set” button and providing a filename 3. Push the “Write output to disk!” button to export the file.
For more details on the various other options available in the File Output dialog, see the Device Reference.
Terrain Meshes
The Mesh Output creates a triangulated mesh from the input heightfield. This is intended for general purpose rendering software or other applications that cannot use a Heightfield; The heightfield should be the preferred output method as it is a much more compact and efficient way of storing terrain data.
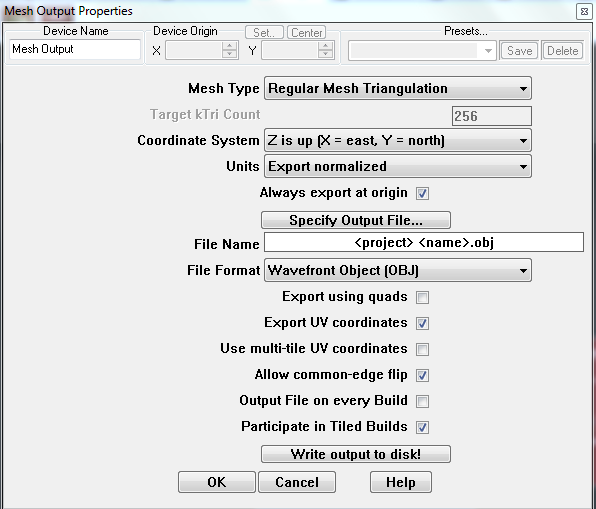
The same three steps described in 6.1.1 are used to export a mesh, and indeed any of the file output devices.
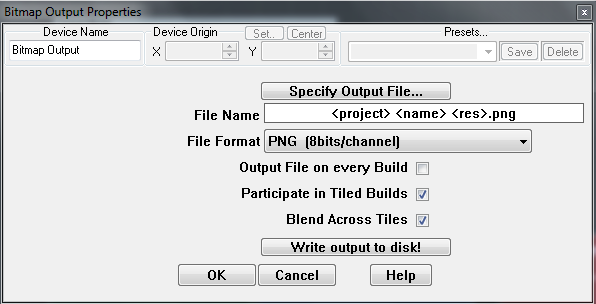
Bitmaps
To export a bitmap, use the Bitmap Output device. This device accepts a bitmap datatype and an optional heightfield you can use to specify a 4th channel for alpha info.
Export Formats:
● 8bit Windows BMP ● 16bit TIFF, PNG The same three steps apply: Set a file format, set a filename, and click “Write output to disk”.
File Input
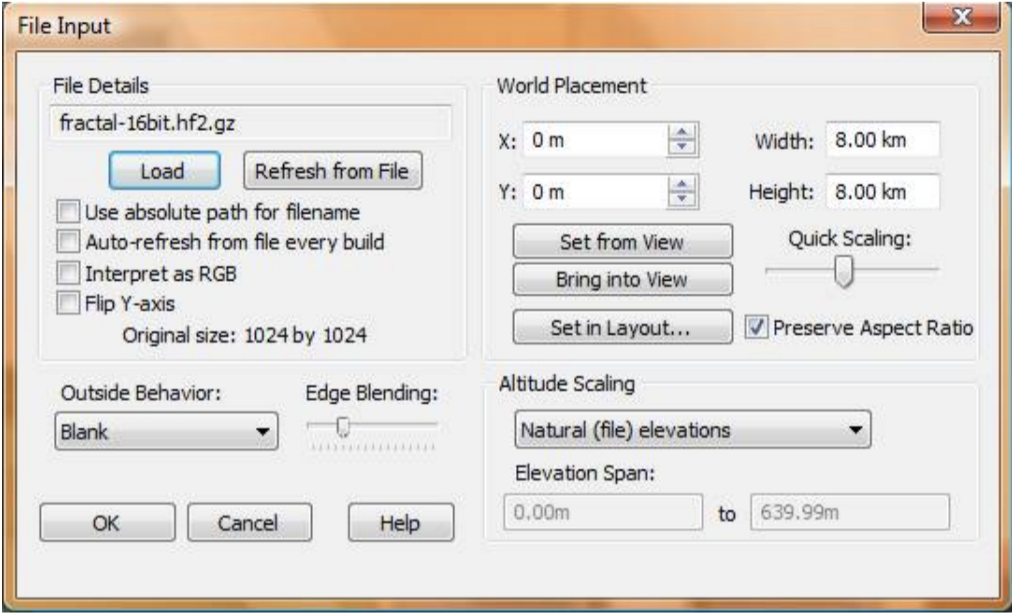
To import an existing file, use the File Input device. It can import a variety of file formats and brings them into the device world as either terrain heightfields or color bitmaps. The File Input is found under Generator Devices.
For more information on the various options available in the File Input dialog, see the Device Reference. The most important ones will be described below.
Loading your file from disk Click on the “Load” button to browse to and select your input file. Once you’ve done so, WM will load it from disk; check to ensure that the “Original Size” readout matches what you expect. If you want to import a file as a Bitmap rather than a Heightfield, make sure that “Interpret as RGB” is checked.
Locating your file in the world It’s very important to understand the relationship between your imported file, the world, and the area being viewed or exported. You can use file inputs for a great many things, from importing very large, rough guide maps that will be refined further in World Machine, to importing specific small features.
When you import a file, you also specify its location in world space via the options in the “World Placement” section.
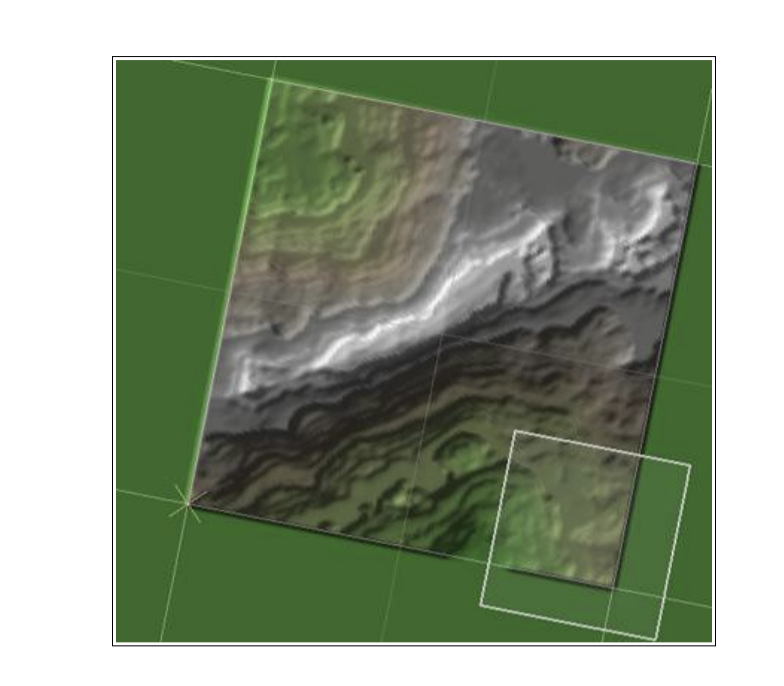
The above view shows how this file input imports to a particular area of the world, which only partially overlaps with the current render extents (the white box). You can either set the worldspace location numerically, or use one of the provided quick placement buttons to place the location of the file into the current render extents. You may also set the extents graphically by clicking the “Set in Layout…” button.
Setting your file’s elevations There are several ways you can map the file’s elevations into the world:
● Natural Elevations: Ensure that the height values in the input file are translated correctly into the same elevation in World Machine
● Full Range: Map the elevations present in the file so that the highest and lowest elevation completely span the possible elevation range inside of World Machine
● Specify: Specify an altitude range in meters that the input data should fall between.
After the mapping of height values, any heights out of range will be clipped to the minimum and maximum altitudes allowed.
You should now have all of the knowledge you need to be able to bring existing terrains into World Machine, operate on them, and export to a file. There is one more file input device, called the Tiled Input Device. It is designed to work on sets of individual tiles that collectively define a terrain region. As a professional-edition only feature, it is described in the Pro Addendum of Chapter 10.